Creating detailed armature progress pictures is an essential part of the sculpting process. Whether you’re a seasoned artist or a beginner, capturing these stages can showcase your skills, document your work, and attract potential clients. In this comprehensive guide, we’ll explore why armature progress pictures are important, how to take high-quality photos, tips for effective presentation, and even the role of social media in sharing your journey.
What Are Armature Progress Pictures?
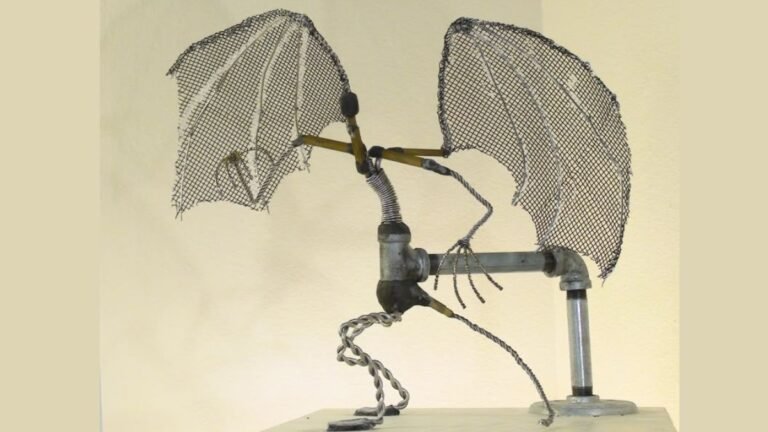
Armature progress pictures are snapshots taken throughout the stages of creating a sculpture, especially in the early phase when building the armature. An armature is the skeletal framework that supports the sculpted material. Artists often begin their work by assembling a wire or metal skeleton, which provides structure and stability as they add layers of clay, plaster, or other sculpting materials.
Documenting each stage through photos not only helps track progress but also provides a visual record of your artistic evolution. These pictures serve as an important tool for reflection, enabling you to see how your work develops over time.
Why Armature Progress Pictures Matter
Armature progress pictures have a variety of uses, both for the artist and for others:
- Documenting Progress: These pictures serve as a visual diary, helping you monitor the growth and changes in your sculpture. They allow you to notice inconsistencies early and make adjustments before proceeding further.
- Building a Portfolio: For professional sculptors or hobbyists trying to build a reputation, showing your armature progress pictures is an excellent way to demonstrate your skills and process. A gallery of your work, showcasing every step, is an engaging way to entice potential clients or followers.
- Learning Tool: Reviewing your own armature progress pictures can reveal areas for improvement. It can also help beginners or students understand the critical steps involved in sculpting.
- Engaging the Audience: If you’re sharing your artwork on social media platforms, progress pictures offer a behind-the-scenes look at your work. People love seeing the process unfold, and this engagement often fosters a stronger connection with your audience.
- Marketing and Promotion: Armature progress pictures can also be used to document and showcase your work for commercial purposes. Whether you’re selling finished sculptures or teaching courses, a series of “before-and-after” images can highlight your talent and attention to detail.
Tips for Taking Effective Armature Progress Pictures
To ensure your armature progress pictures are both visually appealing and useful, consider these tips:
Lighting is Key
Proper lighting is essential to capturing clear, detailed pictures. Natural light is often the best option as it provides even illumination and brings out the true colors of your materials. If natural light isn’t available, invest in a good lighting setup, such as softbox lights, to minimize harsh shadows and create a well-lit environment.
Use a Neutral Background
A neutral background (white, gray, or black) ensures that the focus remains on your sculpture. Avoid cluttered or distracting environments. You want your viewers to focus solely on the sculpting process, not the items surrounding it.
Shoot from Different Angles
Take multiple shots from various angles to capture all the details of the armature. Front, side, and top-down views will allow you to show the structure of the armature as well as any adjustments made during the process.
Use High-Resolution Settings
Ensure your camera or phone is set to a high resolution to capture fine details. This will also allow you to zoom in on specific areas, such as joints or wire structures, for a more technical view.
Document Every Phase
Don’t skip any step! Document every significant stage of your armature construction. From the initial framework to the finished armature before adding sculpting material, each stage provides valuable context.
Consistent Framing
Maintain consistent framing for all your photos. This consistency helps your audience follow the journey more easily. Keep your armature in the same position in each photo for easy comparison.
Avoid Overediting
While editing is fine for brightness or contrast adjustments, avoid heavy manipulation that alters the true appearance of your work. The goal is to present your armature authentically.
Tools for Capturing and Editing Armature Progress Pictures
Camera
Investing in a good camera can make a huge difference. While smartphones today have impressive cameras, DSLRs or mirrorless cameras provide greater control over settings like aperture and shutter speed. These cameras also produce higher-quality images in low-light environments.
Editing Software
Post-processing tools like Adobe Lightroom or even free alternatives like GIMP can help you make subtle adjustments. Make sure to focus on brightness, contrast, and sharpness to enhance details without altering the image too drastically.
Tripod
A tripod is a simple yet essential tool for stabilizing your camera and ensuring your photos are sharp. This becomes especially important when capturing high-resolution images at slow shutter speeds.
Background Setup
A neutral backdrop is necessary, but you can also use a professional photo booth setup with a backdrop cloth for cleaner, more uniform shots. Simple black, white, or gray backdrops will help your armature stand out.
Showcasing Armature Progress Pictures on Social Media
In today’s digital world, social media platforms like Instagram, Facebook, and TikTok offer an excellent avenue for artists to showcase their work and engage with a global audience. To effectively share your armature progress pictures:
- Use Hashtags: Include relevant hashtags such as #sculptureprocess, #armaturebuild, and #artprogress to help your posts reach a wider audience.
- Create Time-Lapse Videos: Instead of posting just still images, consider creating a time-lapse video that condenses the entire armature-building process into a short video. This can be both entertaining and educational.
- Engage with Followers: Respond to comments and questions. The more you interact with your followers, the stronger your community will become. Consider sharing your insights or offering tips in the captions.
- Consistency: Regularly post updates on your armature progress to maintain interest. Consistency is key to building a following on social media.
Armature Progress Pictures vs. Finished Sculptures: What’s the Difference?
It’s essential to understand the difference between armature progress pictures and pictures of the final, completed sculpture. Here’s a breakdown of how the two differ in terms of value:
| Aspect | Armature Progress Pictures | Finished Sculpture Pictures |
| Purpose | To document the sculpting process and structure. | To showcase the final, polished product. |
| Focus | Emphasis on the skeletal framework and technique. | Focus on artistic expression and final details. |
| Audience | Ideal for students, other artists, or anyone interested in the process. | Targeted to potential buyers, clients, and art collectors. |
| Timing | Captured throughout the creative process. | Captured at the end, when the sculpture is completed. |
| Visual Appeal | May look raw or unfinished but is educational. | The image should highlight texture, finish, and detail. |
| Emotional Impact | Shows growth, effort, and progression. | Evokes admiration for the completed work. |
While finished sculpture pictures aim to impress, armature progress pictures document the effort and stages involved in creating the masterpiece. For many artists, both types of images play important roles in building a comprehensive visual portfolio.
Best Practices for Armature Progress Pictures
- Consider Your Composition: Think about how your sculpture interacts with the background and framing. Experiment with different setups before snapping the picture.
- Take Advantage of Detail Shots: Sometimes, capturing close-up shots of intricate areas can add value to your portfolio. Focus on highlighting areas such as wire connections, base structure, and other unique elements that contribute to the armature’s functionality.
- Use Natural Lighting: Where possible, take your photos in natural light. This will provide a clean and clear representation of the materials and techniques you use.
- Create Tutorials or Before-and-After Posts: Using armature progress pictures in a tutorial or side-by-side before-and-after post can attract engagement and highlight your technical ability.
Conclusion
Armature progress pictures are an invaluable tool for documenting, sharing, and refining your sculpting process. Whether you’re a hobbyist, a student, or a professional artist, these images provide a transparent and authentic look at how your work evolves. By mastering the art of capturing and showcasing your armature progress pictures, you’ll enhance your visibility, attract new followers, and create an impressive portfolio that showcases your talent and dedication.
With a few simple tips—like using the right lighting, maintaining consistency, and engaging with your audience—you can take your armature progress photos from basic to brilliant. Remember, these pictures don’t just capture the structure of your work; they also tell the story of your creative journey.